
This ComfyUI workflow sample merges the MultiAreaConditioning plugin with serveral loras, together with openpose for controlnet and regular 2x upscaling in ComfyUI.
Workflow requirements
- MultiAreaConditioning node; from Davemane42’s Custom Node plugin
- Sango lora (lowercase filename); Main subject (Sango from the Inuyasha anime)
- Detail Enhancer / Tweaker (细节调整) LoRA (lowercase); Improves overall details in general
- NeonStyle-Backgrounds lora (lowercase); Improves lighting and general color
- Zeiss lens style lora (lowercase); Reflects the depth of field, color, Bokeh, contrast and other characteristics of Carl Zeiss Milvus lenses.
- OpenPoses collection; required for controlnet.
- ComfyUI-Custom-Scripts; optional, used to improve Comfy GUI.
- RealESRGAN x2Plus; optional, used for upscaling.
ComfyUI workflow screenshot
To take this workflow screenshots we use the Screenshot option from the Custom-Scripts plugin.
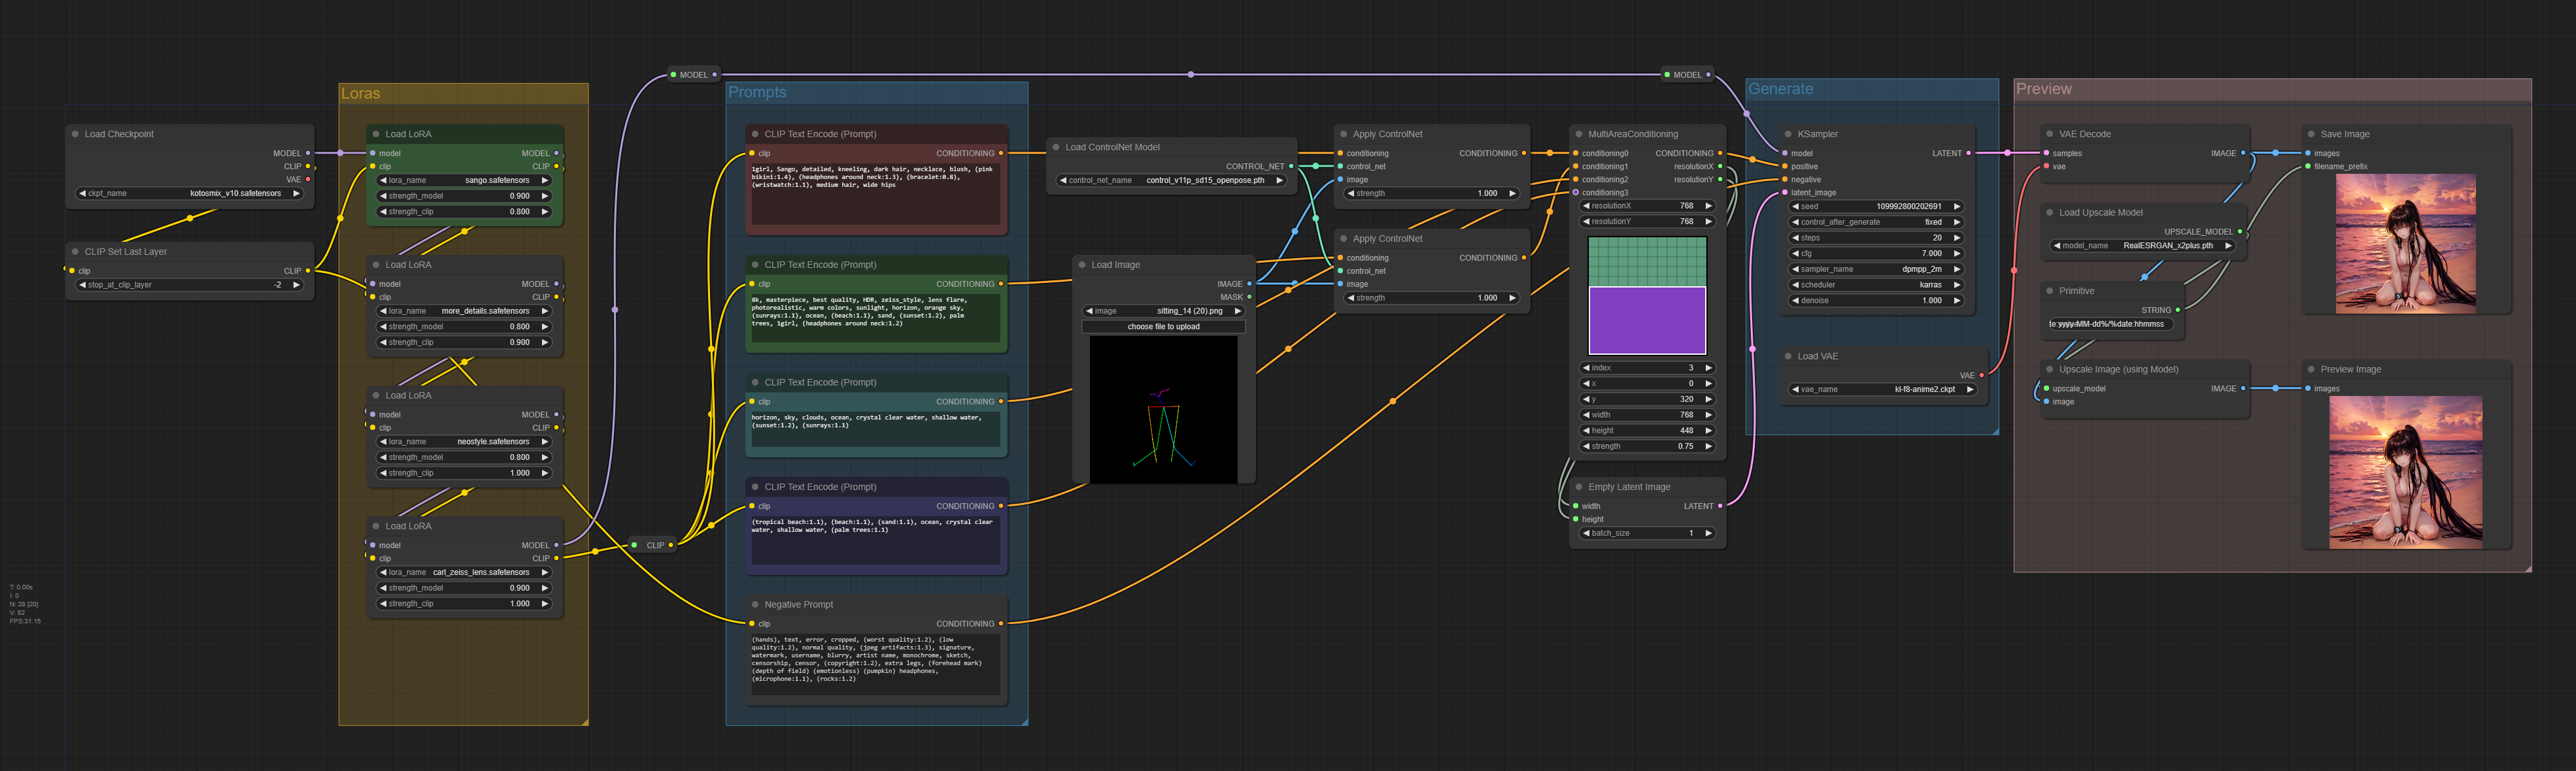
ComfyUI workflow with loras and openpose controlnet
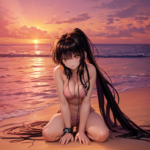
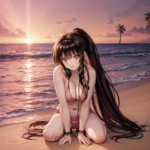
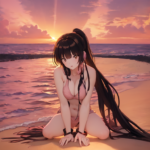
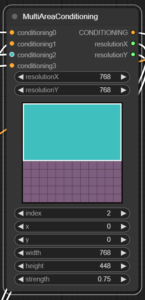
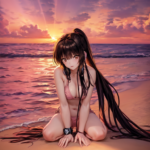
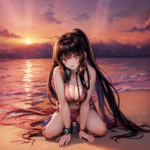
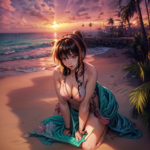
Generated image with LoRAs and ControlNet
This is the original 768×768 generated output image with no inpainting or postprocessing.
 In this image we are controlling the pose with controlnet and the background and subject with area composition nodes.
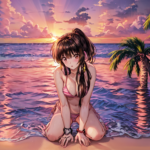
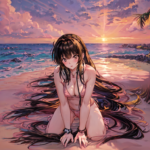
Lora node removal test
This workflow uses a series of cascading loras to improve the final result. To check out the effects of these loras, we have disabled each of them in the workflow to generate the following images.
-
- Carl Zeiss removed
-
- Neo Style removed
-
- More Details removed
-
- All previous removed
Here you can clearly see the effects of removing each lora individually, and removing all of them. Our main Sango subject lora remains active in all cases.
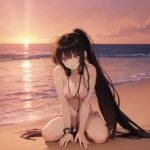
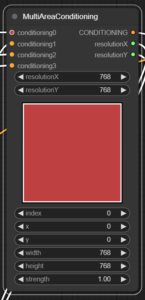
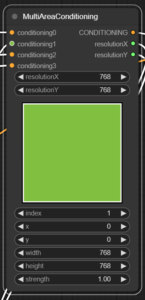
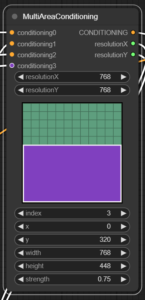
MultiAreaConditioning node
This node from the CustomScripts plugin is an improvement to the built-in Conditioning (Set Area) node and provides a visual preview of the affected areas. In this case we have 4 areas defined as follows.
-
- Main subject prompt
-
- Background prompt
-
- Top area prompt
-
- Bottom area prompt
- Main subject area: covers the entire area and describe our subject in detail.
- Background area: covers the entire area with a general prompt of image composition.
- Top area: defines the sky and ocean in detail. Slightly overlaps with the bottom area to improve image consistency.
- Bottom area: defines the beach area in detail (or at least we try). Slightly overlaps the top area.
ControlNet + OpenPose node
This is an edited version of the sitting_14.png file from the openpose collection ZIP. This image has been shrinked to 512×512 and then added some padding to result in a 768×768 image. Without this process, the subject would have its head and feet cropped because the original pose lacks enough padding to prevent this.
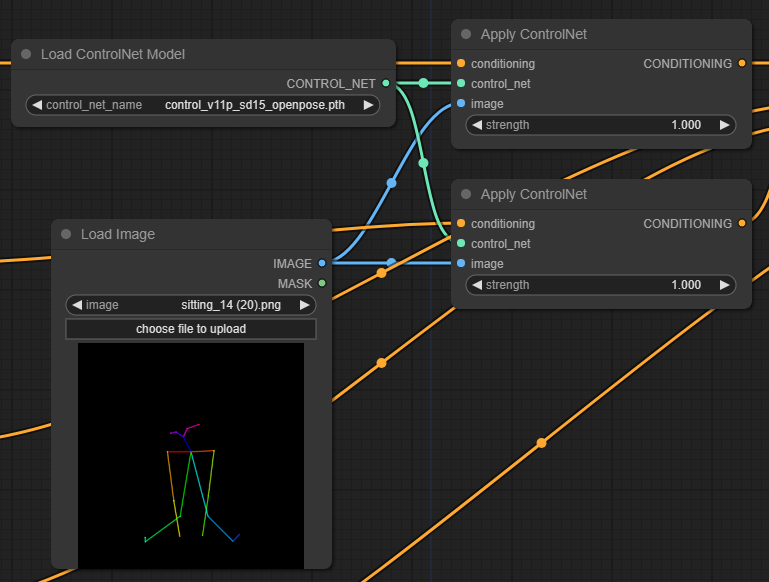
ComfyUI controlnet with openpose applied to conditional areas separately.
We have applied the ControlNet pose node twice with the same PNG image, one for the subject prompt and another to our background prompt. If we don’t add ControlNet to the background prompt, the selected pose will most likely be ignored. I’m not sure if this is a controlnet flaw or a problem with the MultiAreaConditioning node itself.
Trying to apply controlnet openpose to multiple subjects is not feasible with this method, at least not without creating a more complex openpose skeleton PNG image.
External VAE
Some checkpoint models already include their own VAE while others need an external one for better results. In this case we have used the kl-f8-anime2.ckpt VAE file.
Upscaling with model
This workflow includes and upscaling node from RealESGRAN_x2plus.pth plugin to upscale the image by 2x from 768×768 to 1536×1536. Ultimate SD Upscale could also be used, but it takes much longer and results are similar in my tests.
Checkpoint model comparison
Here is the result of the final image with controlnet openpose and all loras active, with a series of different checkpoint models using the same prompts.
-
- kotosmix
-
- abyssorangemix3AOM3
-
- darksun_v40
-
- divineanimemix_1
-
- meinamix_meinaV41
Issues
Perfectly matching the desired result without inpaint or further postprocessing is not as easy as we would expect. Some issues with this image are:
- The requested palm trees are missing
- The sea lacks depth and realism
- The medium hair prompt is blatantly ignored
Download JSON workflow
Here you can download both workflow files and images. To reproduce this workflow you need the plugins and loras shown earlier. The openpose PNG image for controlnet is included as well. Some loras have been renamed to lowercase, otherwise they are not sorted alphabetically.
Simply open the zipped JSON or PNG image into ComfyUI. Notice this requires the Custom Scripts plugin (linked earlier) for the MultiAreaConditioning node.
Comments and suggestions welcome
Use the Disqus comments below to send questions or feedback and I’ll reply whenever I can.
Disclaimer
The content in this post is for general information purposes only. The information is provided by the author and/or external sources and while we endeavour to keep the information up to date and correct, we make no representations or warranties of any kind, express or implied, about the completeness, accuracy, reliability, suitability or availability with respect to the website or the information, products, services, or related graphics contained on the post for any purpose. Some of the content and images used in this post may be copyrighted by their respective owners. The use of such materials is intended to be for educational and informational purposes only, and is not intended to infringe on the copyrights of any individuals or entities. If you believe that any content or images used here violate your copyright, please contact us and we will take appropriate measures to remove or attribute the material in question.