
How to schedule LoRAs weight into your ComfyUI workflow to achieve a better composition control. This method allows applying different weights at different steps.
Requirements
- Updated ComfyUI: requires at least version 2890 released on December 5th, 2024
- ComfyUI Manager: Recommended to manage plugins.
Introduction
Whenever you add a LoRA to your workflow, it can influence not only specific details but also the overall image composition. This effect is especially noticeable with character LoRAs: instead of only applying facial features or clothing, they may unintentionally alter the model’s style or visual identity. A common example is a character LoRA that pushes the entire image toward an anime style due to how it was trained.
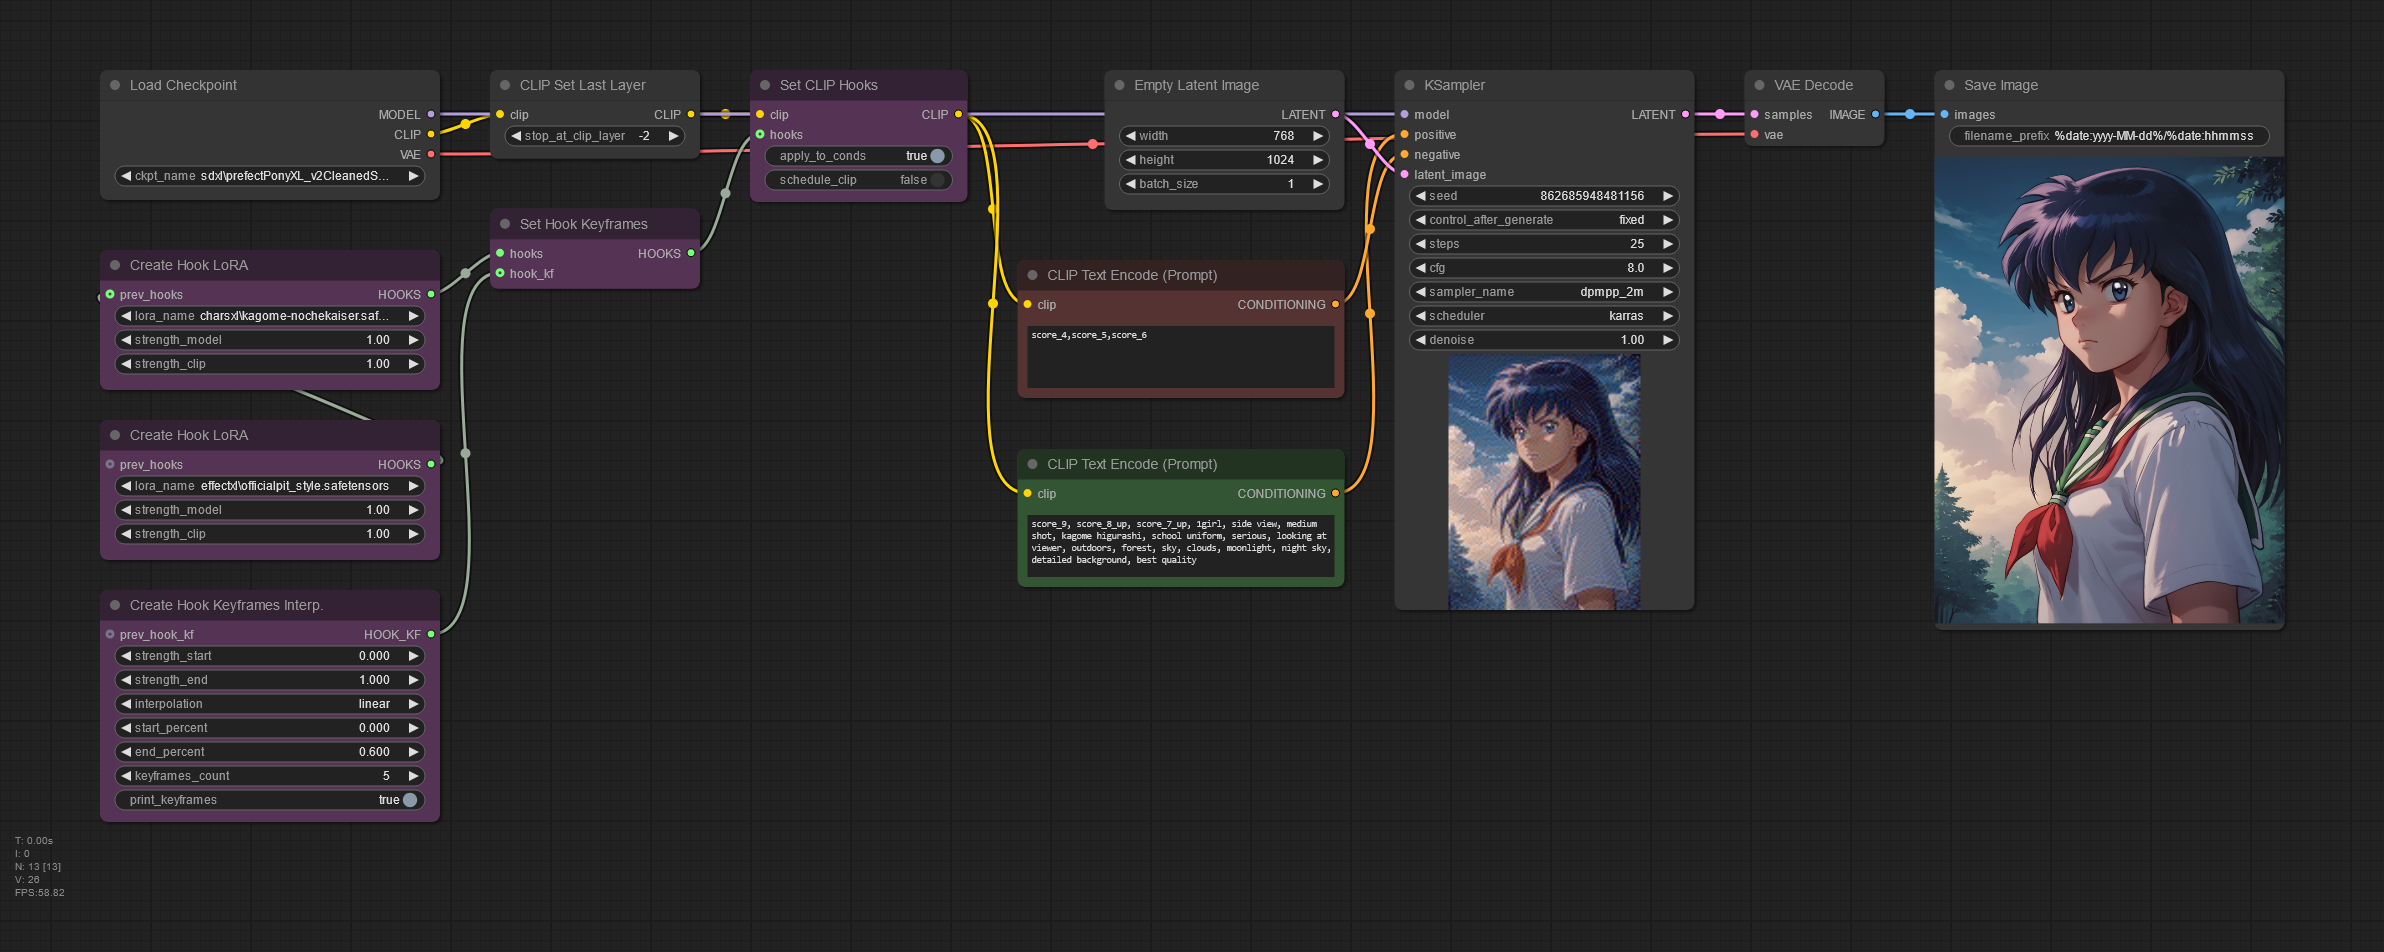
The purple colored nodes here are those required for LoRA scheduling.
In this workflow, both LoRAs are gradually applied with increasing strength, and we also control when they are applied during the sampling process. This results in a smooth image composition retaining the original model features.
Workflow explained
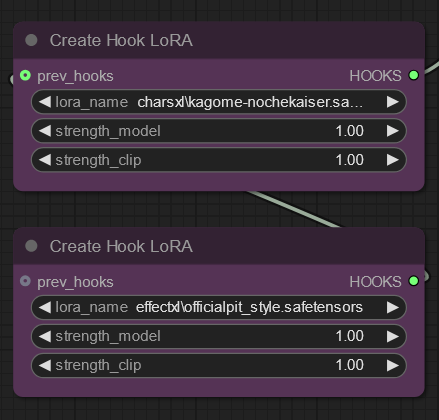
Create Hook LoRA node
This node replaces the standard Load LoRA node. As you can see it does not require any model or clip input. Simply select your lora files, taking into account that its strength will not be increased by the scheduler node. You can apply multiple loras with the same scheduling by chaining them with the prev_hooks input.
Create Hook Keyframes Interp node
This node determines the LoRa’s weight at each sampling step. See the chart in this page to interpret its current values during the sampling process. Understanding this node is essential to use LoRA scheduling, and I tried my best to make its settings as clear as possible here.

Start applying LoRAs from the beginning with 0.000 strength and gradually increase it to 1.000 at 60% of the sampling process using 5 evenly-spaced keyframes.
- strength_start: the lora strength at the first keyframe to be created.
- strength_end: the lora strength at the last keyframe to be created.
- start_percent: when to start applying the lora keyframes, eg:
- a value of 0 would start from the first step
- a value of 0.5 would start at 50% of the sampling process
- end_percent: when to end the lora scheduling.
- this value should be greater than start_percent.
- the rest of the sampling process will continue to use the strength_end (if I understood the node’s behaviour; correct me otherwise in the comments section)
- keyframes_count: determines how many total keyframes to create, including the start and end keyframes.
- interpolation: determines how to scale the strengths in between; the start_percents of the keyframes will remain evenly spaced (linear) no matter the selection.
- print_keyframes: show the actual values assigned to the keyframes in the console.
Both Create Hook Model as LoRA and Create Hook LoRA nodes have an optional prev_hooks input – this can be used to chain multiple hooks, allowing to use multiple LoRAs and/or Model-as-LoRAs together, at whatever strengths you desire.
With our current values, the console has shown this during sampling:
Hook Keyframe - start_percent:0.0 = 0.0
Hook Keyframe - start_percent:0.15000000596046448 = 0.25
Hook Keyframe - start_percent:0.30000001192092896 = 0.5
Hook Keyframe - start_percent:0.45000001788139343 = 0.75
Hook Keyframe - start_percent:0.6000000238418579 = 1.0
Those values have been expanded into a 25-row data series using Chat GPT’s data analysis, representing the scheduled LoRAs weight at each step of the sampling process. Based on this data, Google Sheets has created the following chart showing exactly how the LoRA was applied in our sample workflow:

This chart shows a visual representation of the scheduled LoRAs weight in the sample workflow with our Create Hook Keyframes Interp node values. As you can see, instead of a a constant strength, it starts with 0.00 and it’s gradually increased to 1.0 around step 17. This ensures the LoRAs are gracefully applied as the model is forming the initial image composition. Fine tuning this curve depends on the model and LoRAs used, and the desired image composition.
Set CLIP Hooks node
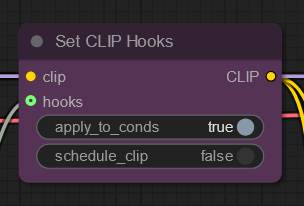
apply_to_conds
When set to true (default), any LoRA hooks applied to the CLIP are automatically attached to the conditioning produced by the Text Encode nodes. In practice, this means the same LoRA affects both how the prompt is interpreted (CLIP) and how the image is generated (model), without requiring any extra wiring. This is the expected and recommended behavior for normal workflows. When set to false, the LoRA only affects CLIP and is not applied to the model conditioning, which is useful only for very specific experimental or debugging scenarios.
schedule_clip
When is false (default), LoRA scheduling via keyframes is applied only to the model/conditioning, while CLIP uses a fixed strength_clip value defined in the Create Hook LoRA node. This keeps the semantic interpretation of the prompt stable while the LoRA influence is gradually introduced during sampling, which is usually more predictable and stable. When set to true, CLIP itself is also scheduled, meaning the prompt is re-encoded for each keyframe with different LoRA strengths; this enables advanced or experimental effects but increases processing time and can lead to less consistent results.
Workflow comparison
Here are the results for comparing our workflow images with and without LoRA scheduling using different checkpoint models.
Prefect Pony XL V2 model comparison
-

- No scheduling
-

- LoRA Scheduling
Pony Diffusion V6 XL model comparison
-

- No scheduling
-

- LoRA Scheduling
Without LoRA scheduling, both models produced almost identical images, indicating that the applied LoRAs significantly overpowered each model’s original style. Instead of complementing the base model, the LoRAs dominated the generation process, effectively masking the stylistic differences that should normally be present.
By introducing scheduled LoRA workflows, the results become noticeably more balanced and intentional. The models retain their distinctive visual identities while still benefiting from the desired LoRA features, leading to a more graceful and controlled composition—much closer to the styles showcased on each model’s CivitAI download page.
🔻Download JSON workflow
Recommended Settings
Best practice tips:
- Use 3–5 keyframes for balance between performance and control.
- Keep schedule_clip = false unless experimenting with advanced CLIP dynamics.
- Always test workflows on a small sampling first.
References
This post was partially based on the Masking and Scheduling LoRA and Model Weights ComfyUI blog entry.
Disclaimer
The content in this post is for general information purposes only. The information is provided by the author and/or external sources and while we endeavour to keep the information up to date and correct, we make no representations or warranties of any kind, express or implied, about the completeness, accuracy, reliability, suitability or availability with respect to the website or the information, products, services, or related graphics contained on the post for any purpose. Some of the content and images used in this post may be copyrighted by their respective owners. The use of such materials is intended to be for educational and informational purposes only, and is not intended to infringe on the copyrights of any individuals or entities. If you believe that any content or images used here violate your copyright, please contact us and we will take appropriate measures to remove or attribute the material in question.